
How to Manage Team API Keys
Team API keys allow external services, scripts, and data pipelines to authenticate with Accessible Data on behalf of your team without exposing personal user credentials.
IMPORTANT
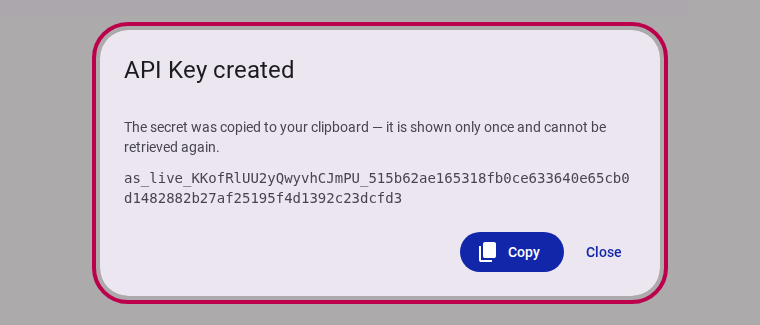
API key secrets are displayed exactly once upon creation. Make sure to copy and securely store your key secret immediately.
This guide walks you through creating a new API key and revoking an existing key when it is no longer needed.
NOTE
The API Keys panel is only visible to team owners.
Part 1: Adding a New API Key
Step 1: Open the API Keys Panel
In the Customer Portal, navigate to Team Settings for your team and select API Keys from the navigation menu.

Click the Create API Key button in the top right of the panel.
Step 2: Open the Create API Key Dialog
A dialog will appear prompting you for details to identify the new key.
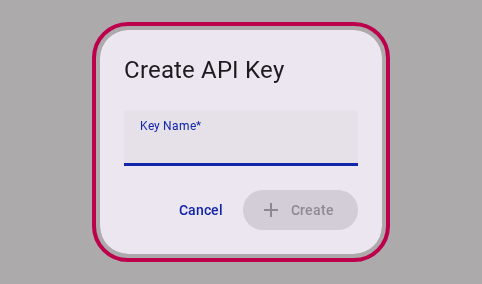
Step 3: Enter a Key Name
Enter a descriptive name for the API key (for example, Data pipeline or Analytics Integration) so team members can easily identify its purpose.

Step 4: Copy and Save the Secret
Click Create. The generated secret key will be displayed exactly once and automatically copied to your clipboard.
WARNING
Store the secret key in a password manager or secure vault immediately. Once closed, the raw key secret cannot be viewed or retrieved again.
Step 5: View the New Key in the List
Click Close. Your newly created key will now appear in the list with its name, prefix ID, and creation date.

Part 2: Revoking an API Key
If an API key is compromised, or an integration is retired, you can revoke it immediately.
Step 1: Locate the Key to Revoke
In the API Keys panel, find the key you wish to remove and click the Revoke button in its row.

Step 2: Confirm Revocation
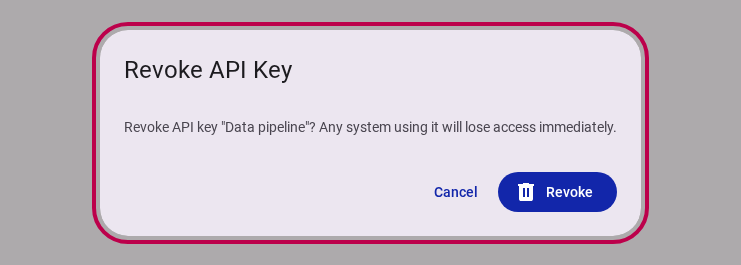
A confirmation dialog will open warning that any system using the key will lose access immediately.
Step 3: Complete Revocation
Click Revoke. The system will process the revocation request in real time and remove the key from your active key list.